The post Two Ingredients Creamy Cauliflower Mayonnaise Spread Simple Recipe appeared first on The World Is an Oyster.
]]>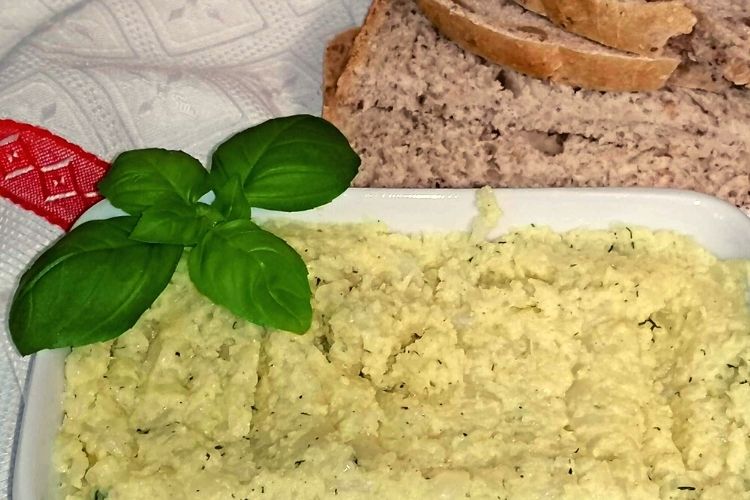
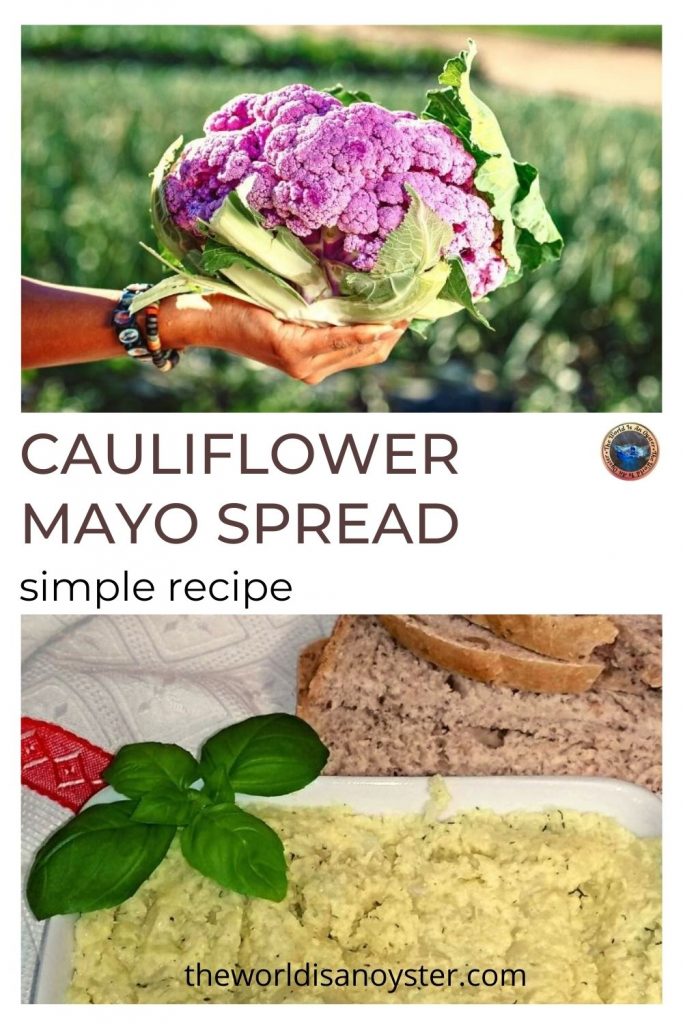
Creamy cauliflower mayonnaise spread or cauliflower salad (salată de conopidă) is a Romanian appetiser that is easy to make, light in calories and tasty. The Romanians would call it ‘salad’ although technically it is a spread because we spread it on bread slices and seldom dip a piece of bread into the bowl – therefore not a dip either.
This post may contain affiliate links, which means I will receive a commission if you purchase through my links at no extra cost to you. Please read the full disclosure for more information. Thank you!
The version I am making today is the simple one, containing two basic ingredients (cauliflower and mayonnaise) plus a handful of spices.

There are many alternations and variations for a creamy cauliflower mayonnaise spread according to your tastes. If you prefer a tangy bite, you can add freshly squeezed lemon juice. For a more robust flavour, you can add smashed garlic.
I have heard of feta cheese, yoghurt, tuna or chicken combinations but never tried any. I prefer my creamy cauliflower mayonnaise spread or cauliflower salad simple. Any meat addition would transform it into a different dish and pile up on the calories.
The mayonnaise in this recipe serves as a glueing agent that would confer the creamy texture. Preferably, homemade mayonnaise is the better option, but a store-bought organic one works well for busy cooks.
Why Cauliflower?
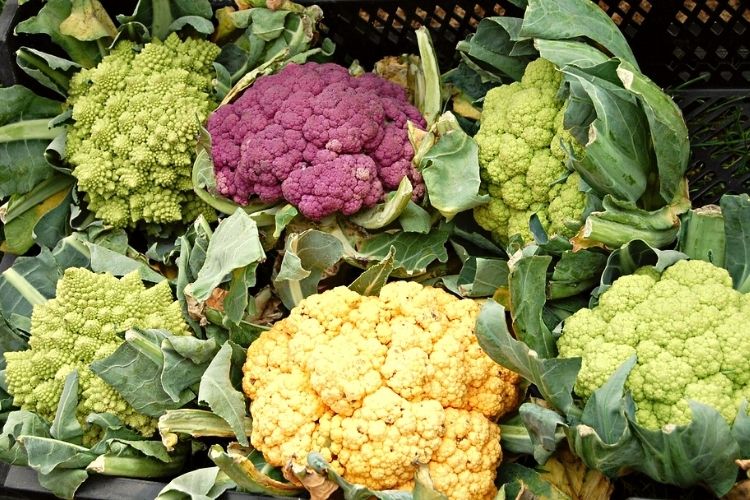
Not everybody’s cup of tea, cauliflower is a cruciferous vegetable, good cousin with broccoli, cabbage or kale – all low caloric high fibre superfoods packed with vitamins and minerals.
Some affections require caution in the amount of cauliflower consumed. It could interfere with iodine absorption (for thyroid sufferers), cause bloating (associated with Crohn’s disease), or affect blood-thinning medication because it contains high levels of vitamin K.
All that in mind, cauliflower is an excellent antioxidant that has a significant role in brain development, immunity, preventing heart disease, deactivating carcinogens and thus reducing cancer risk.

The smell of boiling cauliflower seems to be the most significant deterrent to cooking it, but this recipe requires minimal boiling or steaming time.
Ingredients for Creamy Cauliflower Mayonnaise Spread
One large cauliflower
Mayonnaise
Salt
Pepper
Paprika or turmeric for colour (optional)
Method
Place water in a large pot and bring it to the boiling point.
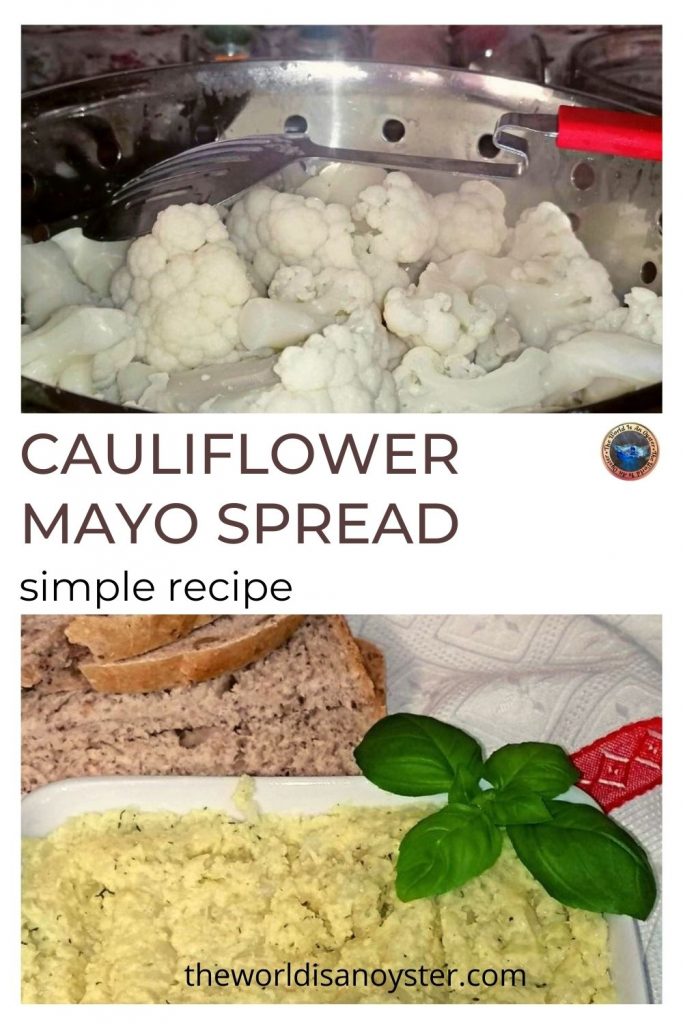
Wash the cauliflower and remove the leaves. Cut or separate it into small florets.
When the water boils, place all florets into the pot and cook them over medium heat for 3 minutes. Turn the heating down and transfer the florets into a colander. Allow them to drain and cool completely.
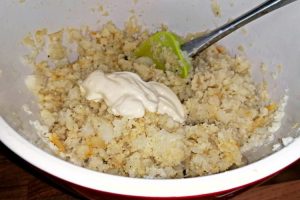
Place the florets in a large ceramic or glass mixing bowl when cooled. Use a potato masher to mash the cauliflower florets and stems into tiny pieces.
Add salt, pepper and paprika/turmeric and mix using a large spatula or wooden spoon. Add mayonnaise and mix until the texture becomes creamy.

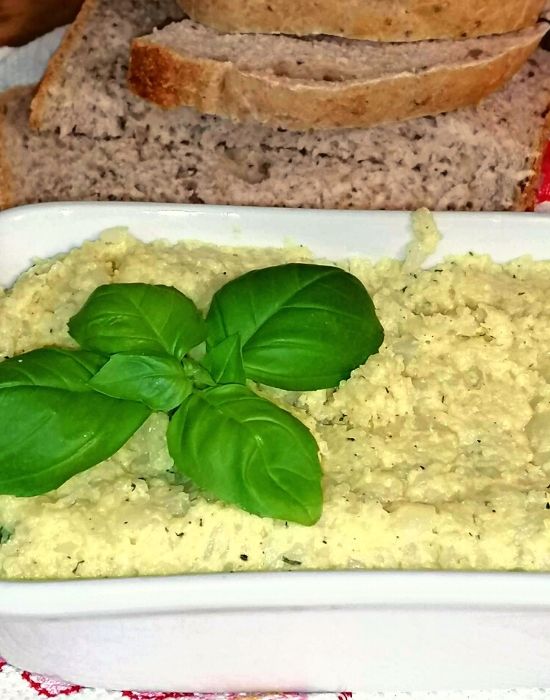
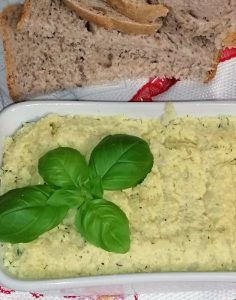
Transfer the desired amount of creamy cauliflower mayonnaise spread into a serving dish, sprinkle freshly cut dill (optional, for colour variation) and serve with homemade bread or pita bread.
Enjoy!
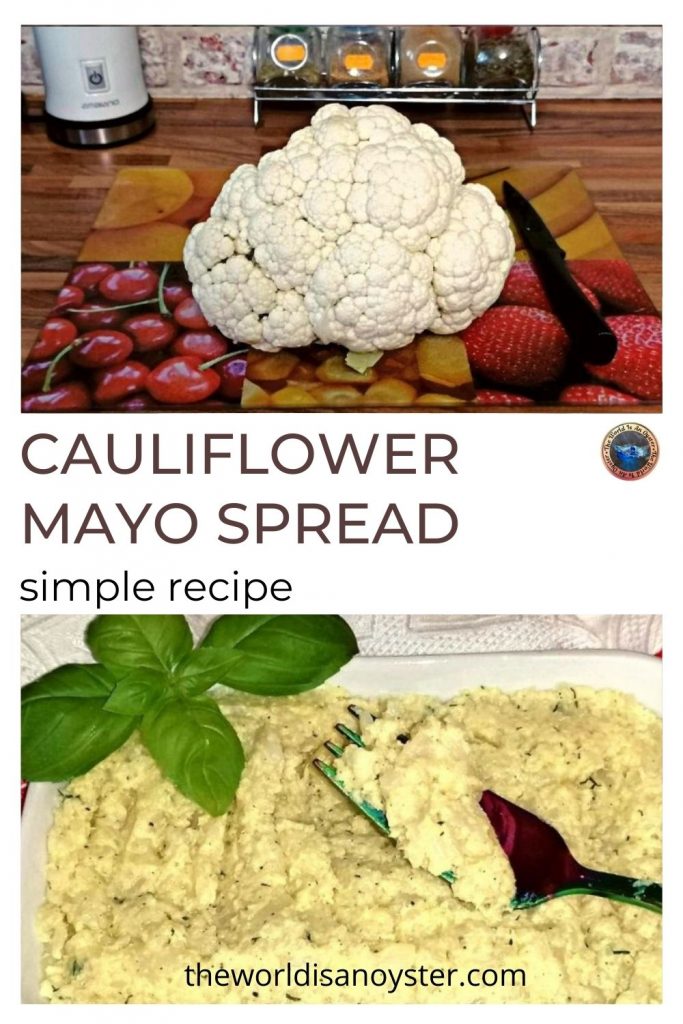
Two Ingredients Creamy Cauliflower Mayonnaise Spread (Salad)
Ingredients
- 1 piece organic cauliflower large
- 1-2 tbsp organic mayonnaise light
- ¼ tsp black pepper ground
- ½ tsp salt sea/rock
- ¼ tsp paprika or turmeric optional
Instructions
- Fill ⅔ of a large pot with water and bring it to the boiling point.
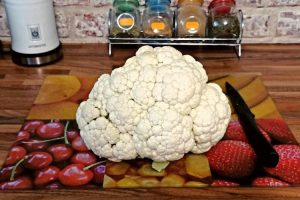
- Wash and remove the leaves of the cauliflower. Separate/cut the florets.
- Add the florets to the boiling water and cook for 3 minutes over medium heat. Do not overcook, as the cauliflower needs to remain crisp. If overboiled, the cauliflower will become soggy and lose all the nutrients in the process.

- When ready, transfer the florets into a colander. Allow the cauliflower to drain and cool completely before the next step.
- Place the cooled florets in a large ceramic or glass mixing bowl.

- Use a potato masher to mash the cauliflower into tiny pieces.
- Add salt, pepper and paprika or turmeric (or both) and mix gently with a spatula or a large wooden spoon.
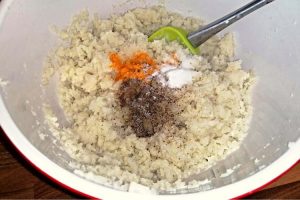
- Add the mayonnaise and mix until the texture becomes creamy.
- Optionally, sprinkle freshly-cut dill to offer colour.
- Fill serving dishes with the desired amount and place them on the table next to sliced bread.
Notes
Two Ingredients Creamy Cauliflower Mayonnaise Spread Simple Recipe
The post Two Ingredients Creamy Cauliflower Mayonnaise Spread Simple Recipe appeared first on The World Is an Oyster.
]]>The post How to Make a Creative Charcuterie Platter for Any Occasion appeared first on The World Is an Oyster.
]]>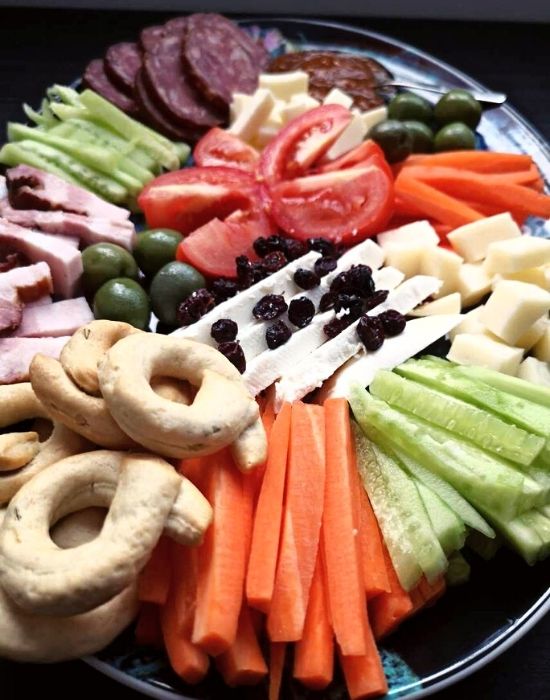
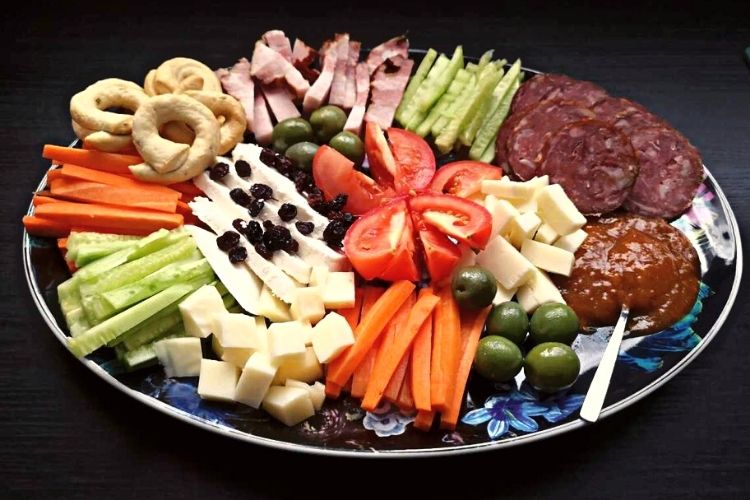
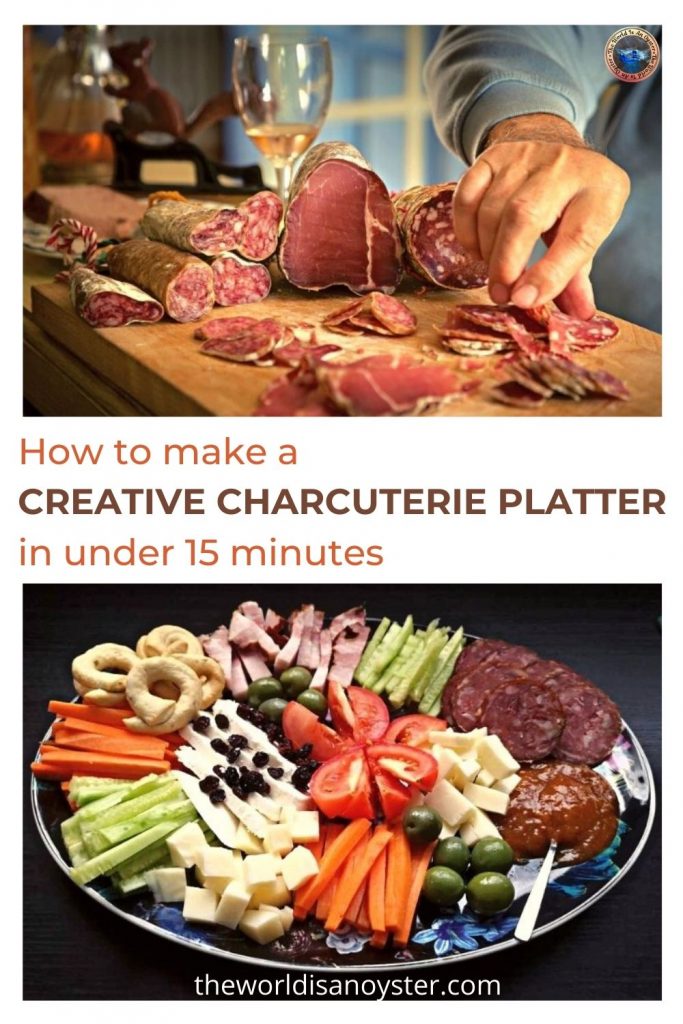
Making a DYI creative charcuterie platter is easier than it seems, not to mention the cost is a fraction of ready-made ones. All you need is a bit of imagination and research into the beneficiary’s tastes.
Select various flavours, textures and colours for your platter or board that will satisfy even the fussiest eaters.
This post may contain affiliate links, which means I will receive a commission if you purchase through my links at no extra cost to you. Please read the full disclosure for more information. Thank you!
The beauty of a creative charcuterie platter is that it looks impressive and appetizing, so it should sort out fussiness. You also have the choice to include all groups of foods you desire, according to your lifestyle or specific diets.
Besides, it can make the centrepiece on any festive dinner table, be it Christmas or New Year’s, Easter, Mother’s Day, Father’s Day, International Children’s Day, birthday and any other important day, not to mention a romantic Valentine’s Day dinner for two or a house party.
Anything goes, even a fancy weekday dinner when you don’t know what to cook and storm the fridge for open packs (still in date!) of cheese and meats.
Although humans have eaten cured meats for tens of thousands of years, the art of charcuterie is more related to Renaissance France. In modern times, charcuterie became increasingly popular worldwide because of its pleasant visual presentation and the fact that it permits using a large variety of ingredients at once.
What Type of Dish is Best For a Creative Charcuterie Platter?
A large round or oval porcelain platter or a bamboo board will do. A fancy board with accessories will make a better impression, of course, but a platter stored for ages somewhere in the cupboard it’s just fine for the job, too.
The porcelain platter I typically use is oval and 40 cm/16″ long. That counts as a “large” board that, when filled with goodies, sells for about £150, yet you can make it with under £10, and none will be the wiser!
A large platter easily feeds four people. Of course, you will need a few of them for parties, depending on how many guests you expect.
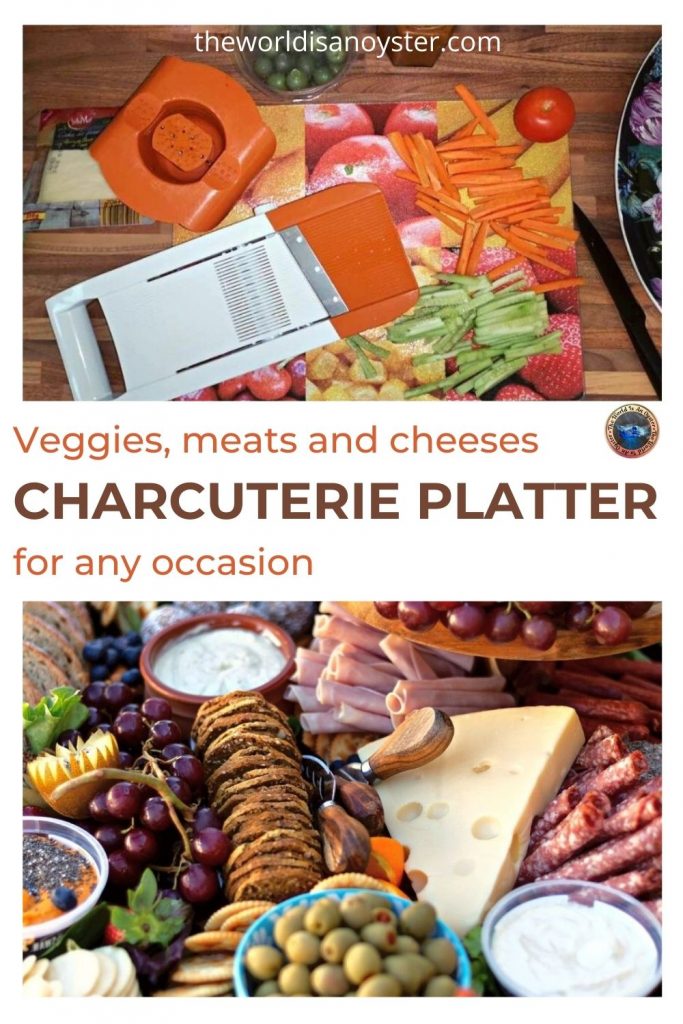
Ingredients for a Basic Board
Any charcuterie platter or board should contain a few essential ingredients you can work with to create a culinary masterpiece:


- bread/crackers/breadsticks
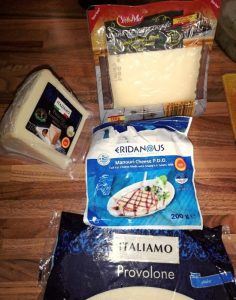
- cheese – include an assortment of flavours (salty, sweet, spicy, savoury) and textures (creamy, chewy, brittle, dense)
- meats – cured, cooked, smoked, paper-thin slices (prosciutto, ham) or thick slices (salamis)
- raw vegetables – include several colours and textures
- fruits and nuts – fresh/dried fruits; any nuts (check for nut allergy!)
- dips and spreads – jam, humous etc
- treats/sweets (optional) – depending on the occasion
What you choose to include on your charcuterie platter is as important as the presentation.
Firstly, I recommend using organic products from a source you trust or homemade (jam, humous, sausages).
For packed foods, check the expiring date. If the packs were already opened, make sure they still are in the recommended time frame for safe consumption.
How to Assemble Creatively the Charcuterie Platter

Use a clean, dry platter or board. Make sure you have enough room on the worktop for all the ingredients.
Start with washing, peeling and chopping the vegetables. Prepare the other ingredients that are okay at room temperature for longer (olives, nuts, fruits).
Always use labelled chopping boards when cutting foods to avoid cross-contamination.
Use the right slicer for the vegetables, according to the style you choose to cut them. For a skilled cook, a professional knife can sort it. For more design options and speed, I recommend using a multi-blade cutter.
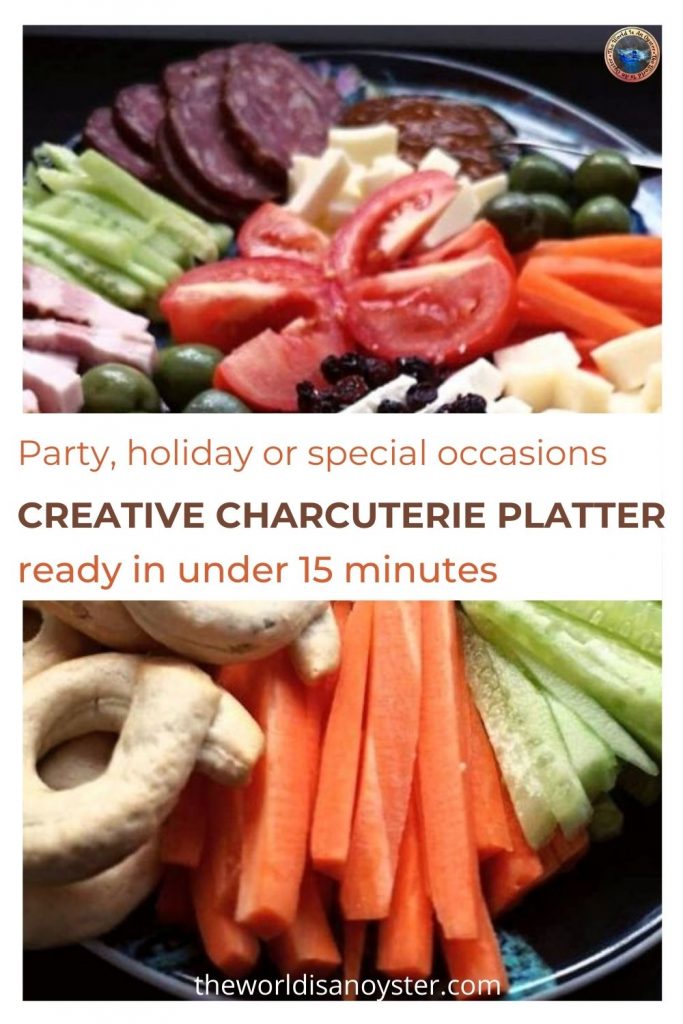
Combine and position the basic ingredients to make them easily accessible to everybody at the table.
Given the plethora of tastes and textures, perhaps it is good to use flavour-free bread/crackers. I used fennel Taralli for this platter because I wanted to finish an open bag before it became soggy (moisture affects food quality, especially in a humid climate.) The combination of flavours was interesting, enhanced by the warm, sweet aroma of fennel seeds.
When you finish placing the vegetables and crackers on the platter, bring the cheese out of the fridge, slice or cut it into cubes and put it among the rest of the ingredients.
Continue with the meats. Use a meat labelled chopping board to slice or cut them as preferred and place them on the platter in an eye-pleasing manner.
Sprinkle dried fruits and chopped nuts over the platter. Optionally, add sweet treats that can make a dessert for this meal.
Serve immediately, paired with a wine of choice or cover the platter with cling film and keep it in the fridge if your guests haven’t arrived yet.
Use kitchen tongs or toothpicks (children, especially, would find it fun!) to fill your plate and enjoy!

Your creative charcuterie board looks epic and guaranteed will impress anyone partaking! Pair it with a glass of wine and bon appetite!

Creative Charcuterie Platter
Equipment
- Labelled chopping boards
- Chef knife
- Slicer
- Large porcelain platter
- Serving plates
Ingredients
- 1 carrot organic, large
- 1 cucumber organic, large (or two small)
- 1 tomato organic, large
- 1½ bell pepper organic, optional
- 1 handful Nocellara olives or any other type
- 1 handful savoury Taralli or bread sticks, crackers, bread
- 150 g smoked bacon (kaiser ham) or any other ham
- 150 g spicy chorizo or any other sausage/salami
- 50 g cow cheese
- 50 g dense goat cheese
- 50 g sheep cheese
- 50 g soft cheese
- 2 tbsp apricot or strawberry jam organic
- 1 tbsp medium-hot mustard for meats optional
- 1 handful dried cranberries or any other dried/fresh fruit
- 1 handful chopped walnuts or any other nut
Instructions
- Wash, peel and slice the vegetables. Use labelled boards for each ingredient group to avoid cross-contamination. For creativity, use a slicer with various blades.

- Combine and position the basic ingredients to make them easily accessible to everybody at the table.
- Bring the cheeses out of the fridge, cut/slice and add them creatively among the other ingredients.
- Slice the meats using a meat-labelled chopping board.
- For an eye-pleasing effect, either roll the slices or use a glass to create a flower-like salami (place overlapping slices on the rim, push the middle into the glass, then turn it upside-down and remove the piece gently to keep the shape)
- Sprinkle dried or fresh fruits and chopped nuts over the platter.

Notes
Cover photo credits Tye Doring, Unsplash.
How to Make a Creative Charcuterie Platter for Any Occasion
The post How to Make a Creative Charcuterie Platter for Any Occasion appeared first on The World Is an Oyster.
]]>